Welcome to Indiana Patient Portal,
This comprehensive guide will walk you through the process of installing and using the Indiana Patient Portal application. Our easy-to-follow instructions will help you access your healthcare services efficiently and securely.
Installation Guide
Android Installation Steps
- Launch the Google Play Store application on your Android device
- In the search bar at the top, enter "Indiana Patient Portal"
- Locate the official Indiana Patient Portal application
- Tap the "Install" button to begin the download
- Review and accept the required permissions
- Wait for the installation to complete
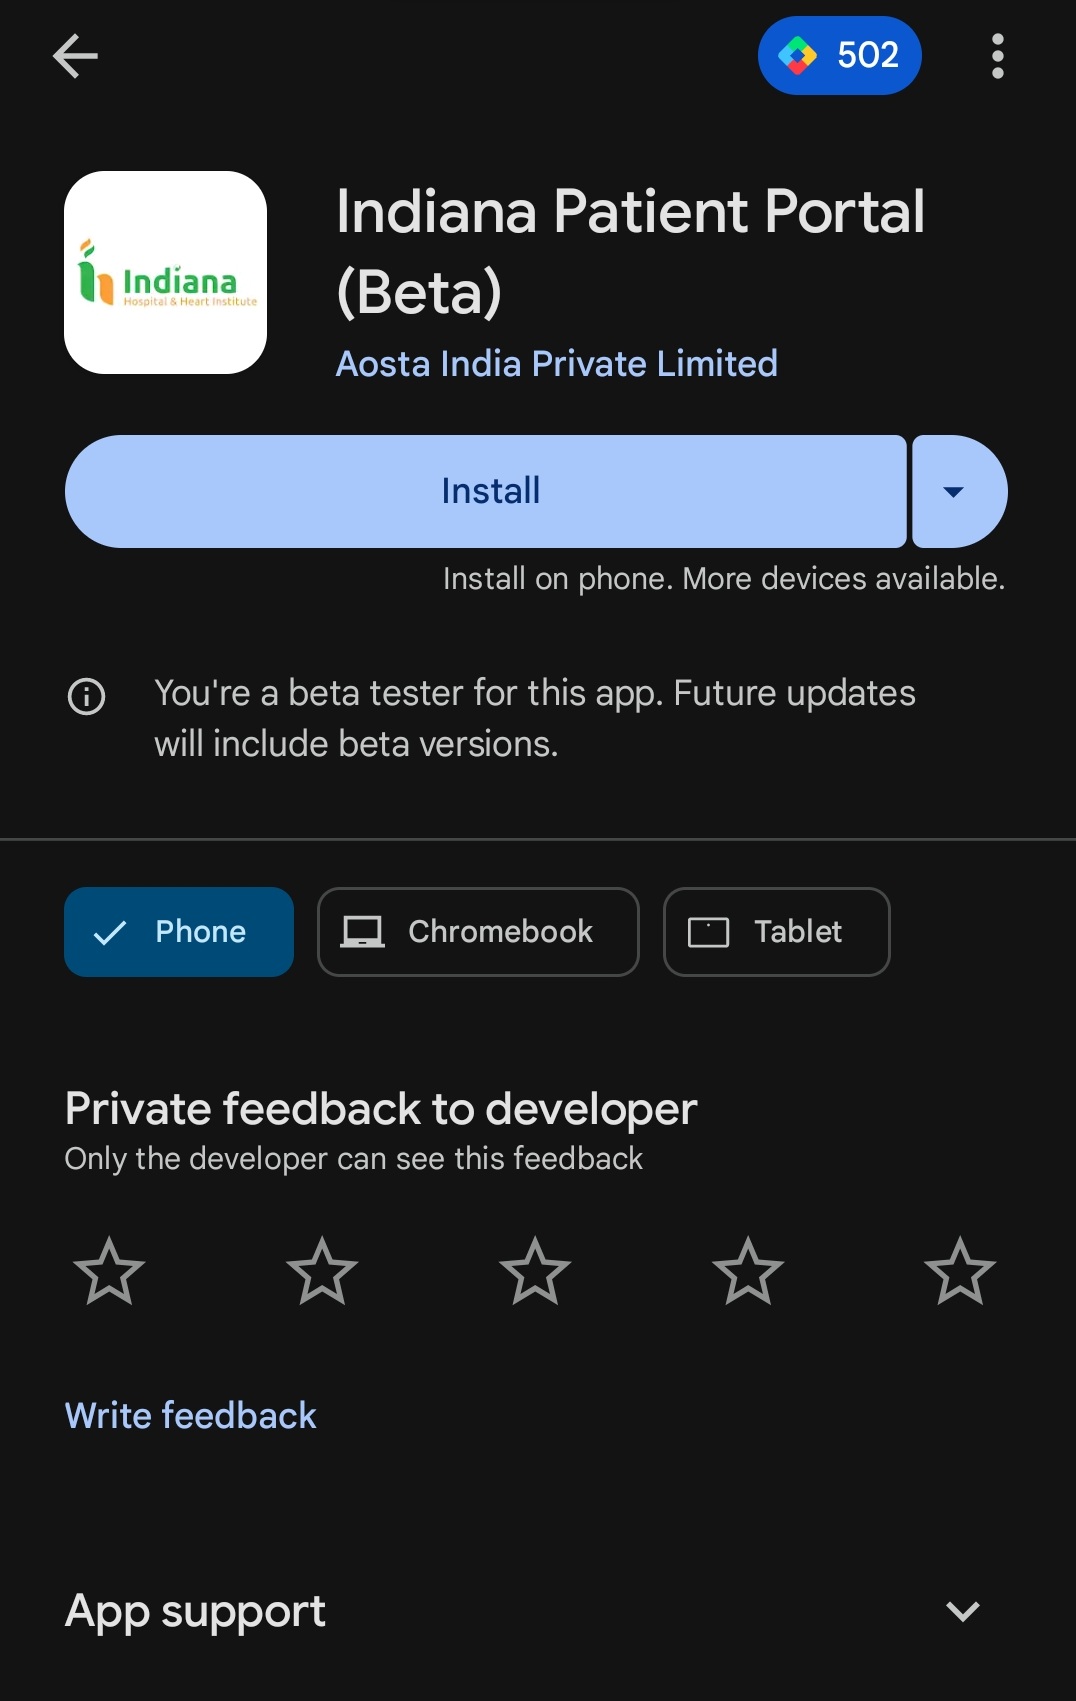
Play Store Installation Screen
iOS Installation Steps
- Open the App Store on your iOS device
- Tap the Search icon and enter "Indiana Patient Portal"
- Locate the official Indiana Patient Portal application
- Tap "Get" or "Install" to begin the download
- Authenticate using Face ID, Touch ID, or your Apple ID password
- Wait for the installation to complete
Initial Setup & Account Creation
1. Welcome Screen
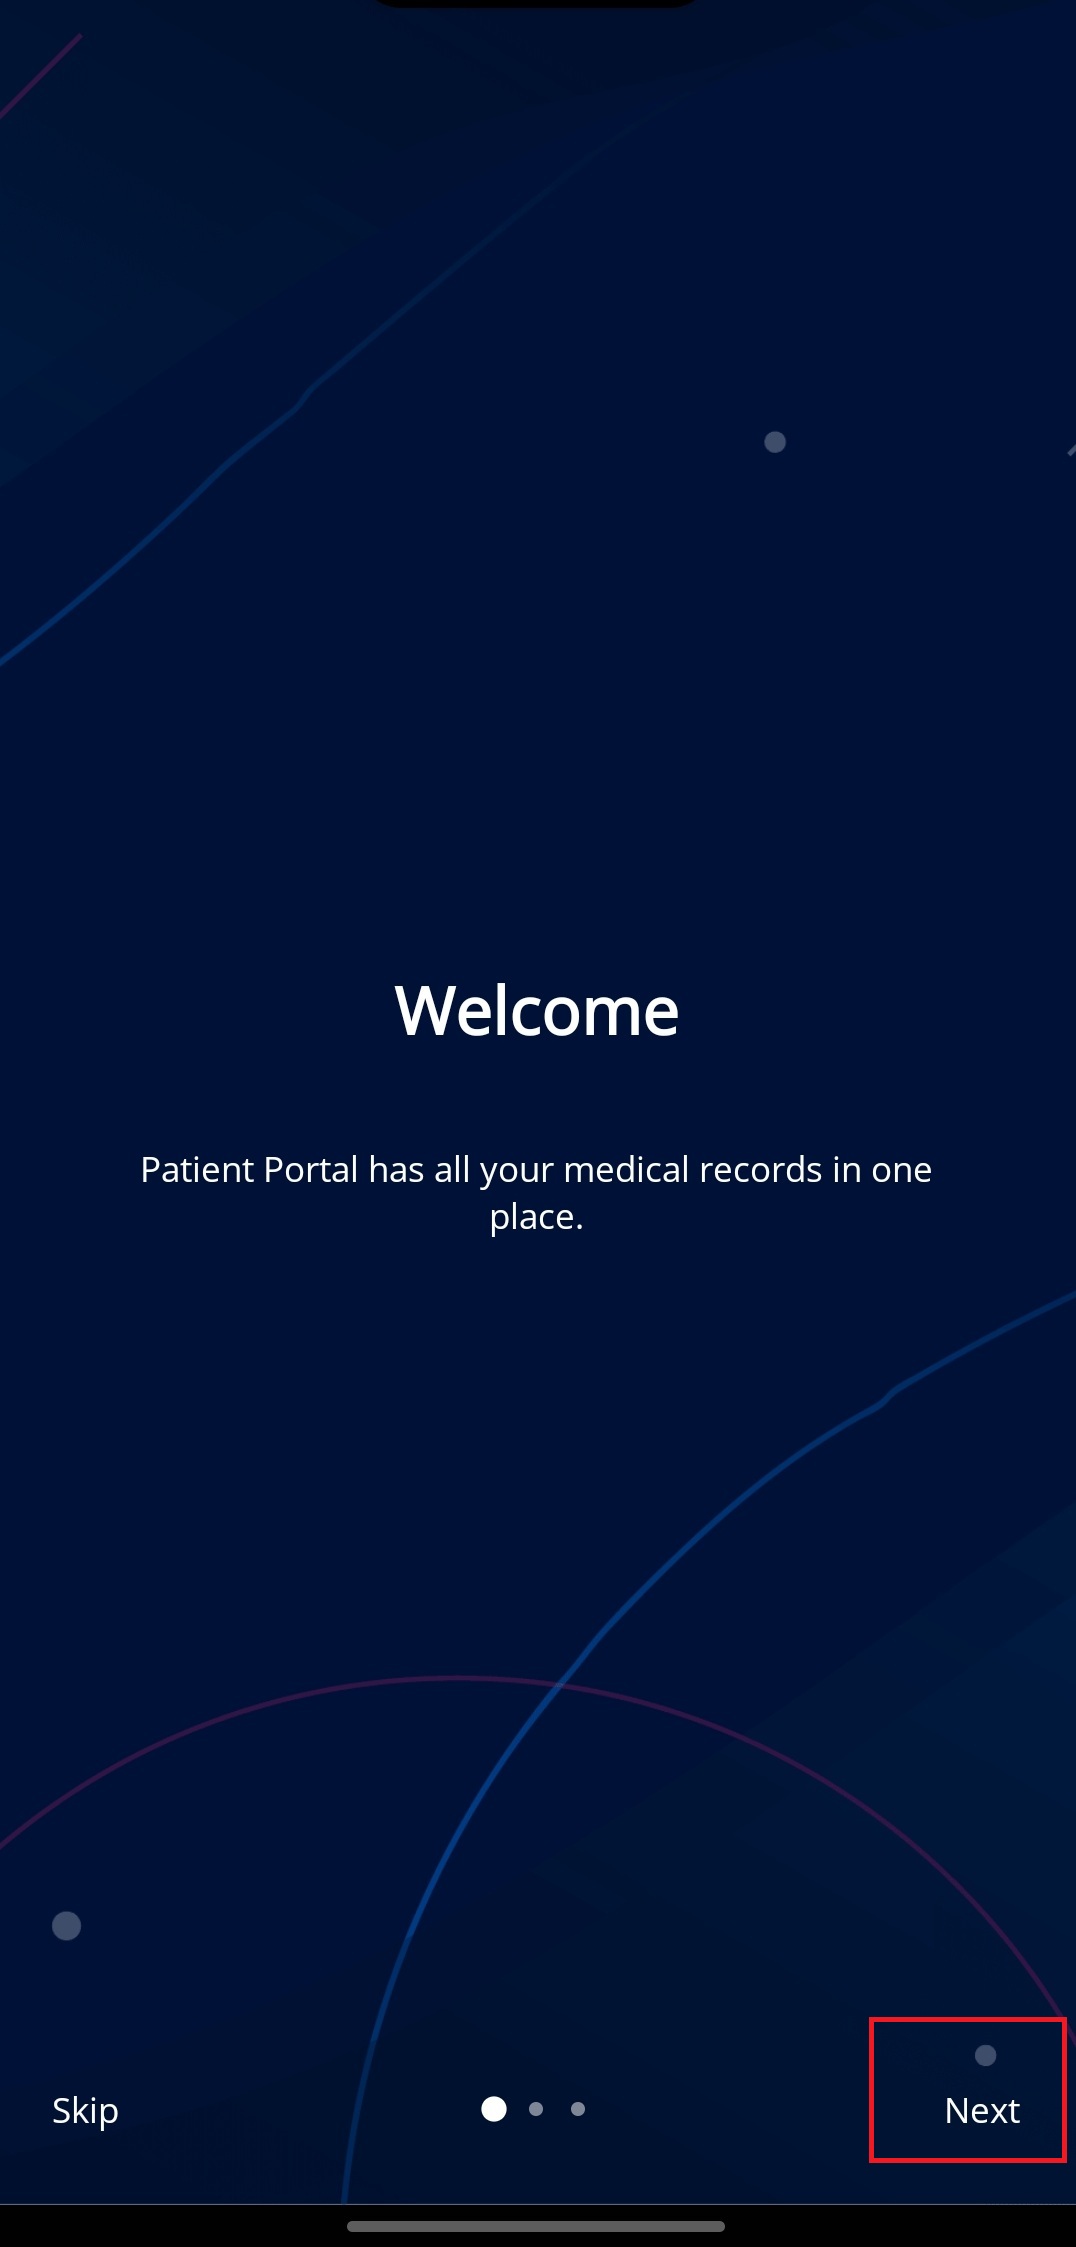
Begin by launching the application. Tap "Next" in the bottom right corner to proceed.
2. Authentication Screen
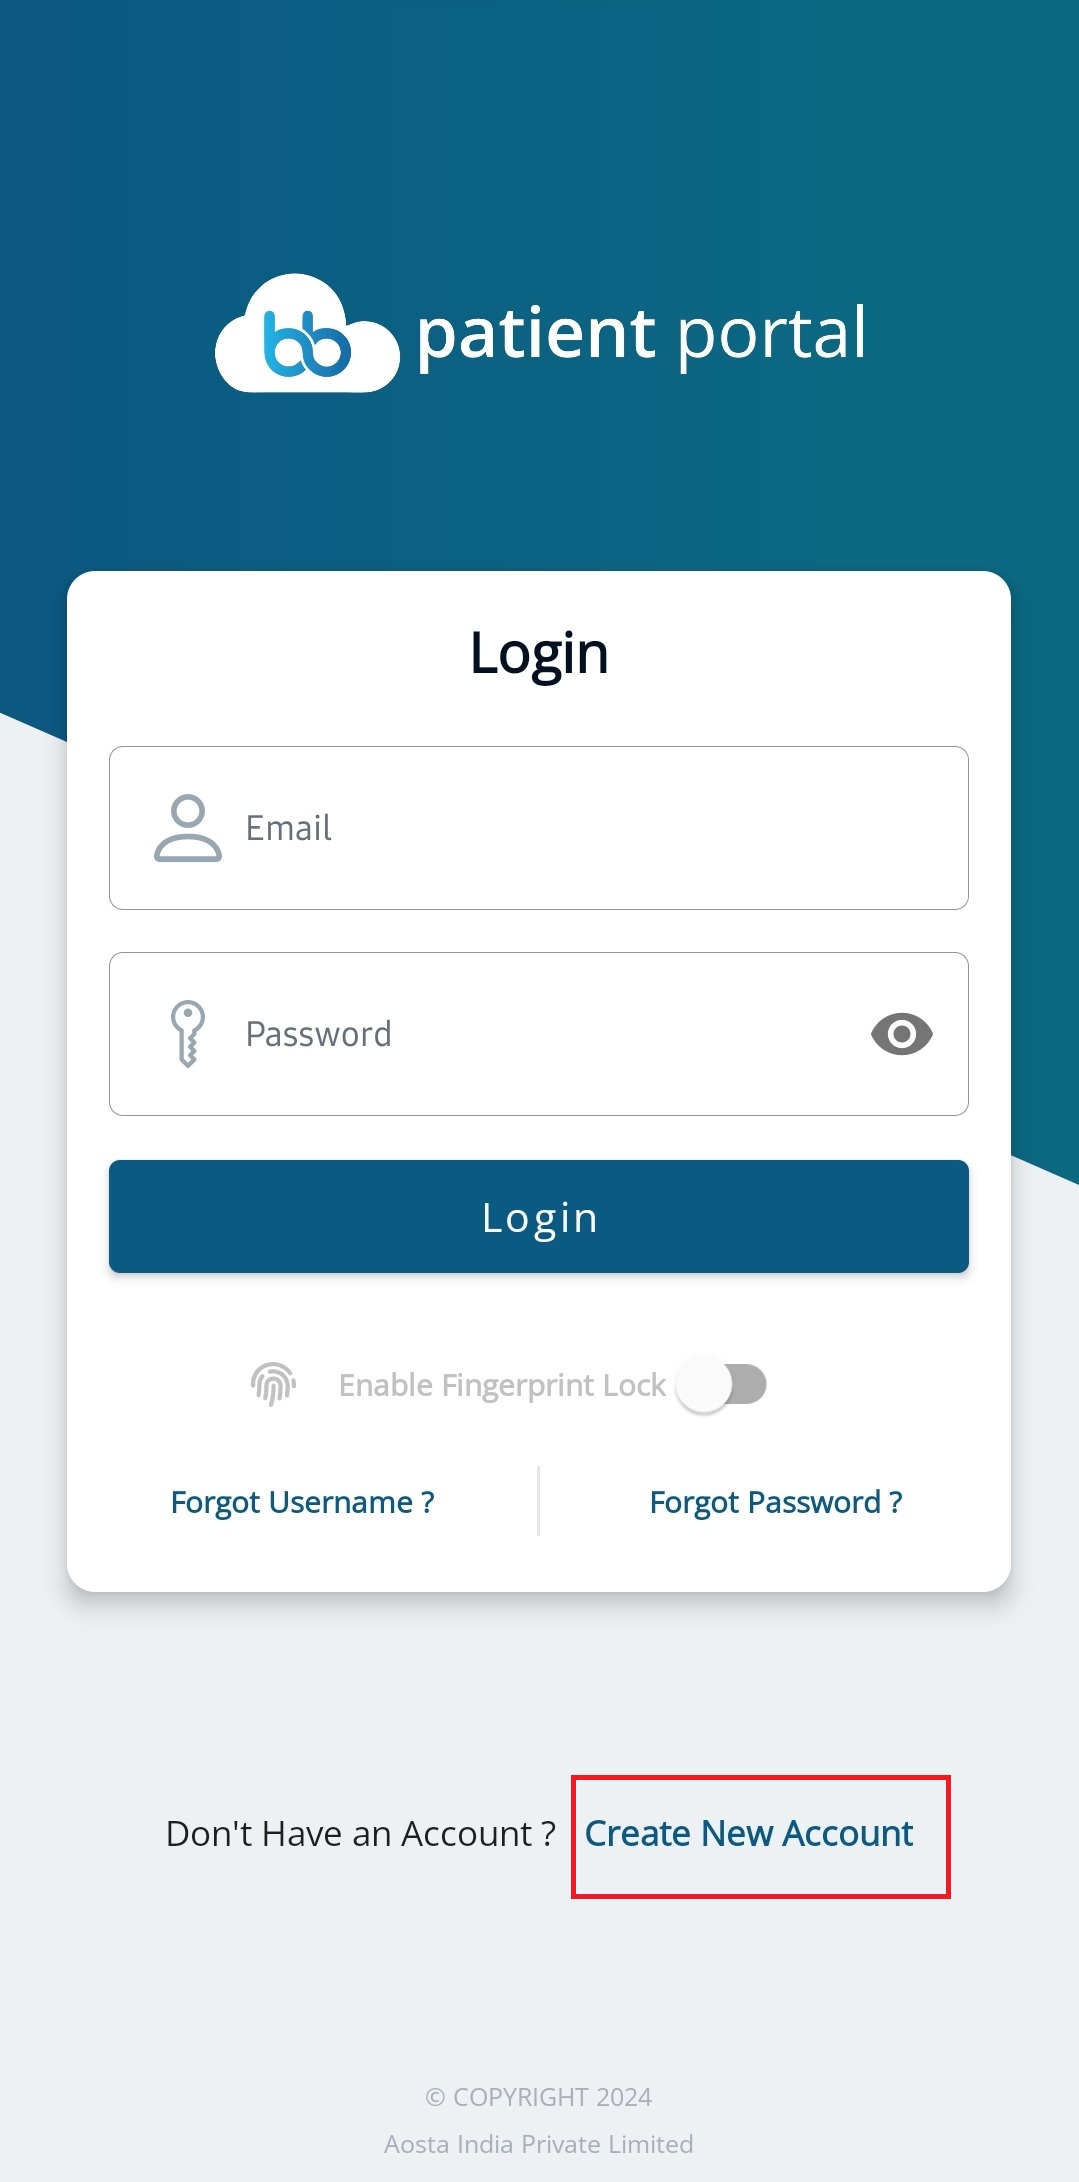
Choose between creating a new account or signing in to an existing one.
3. Account Registration

Complete all required fields to create your account. Ensure information accuracy for proper verification.
4. Login Screen
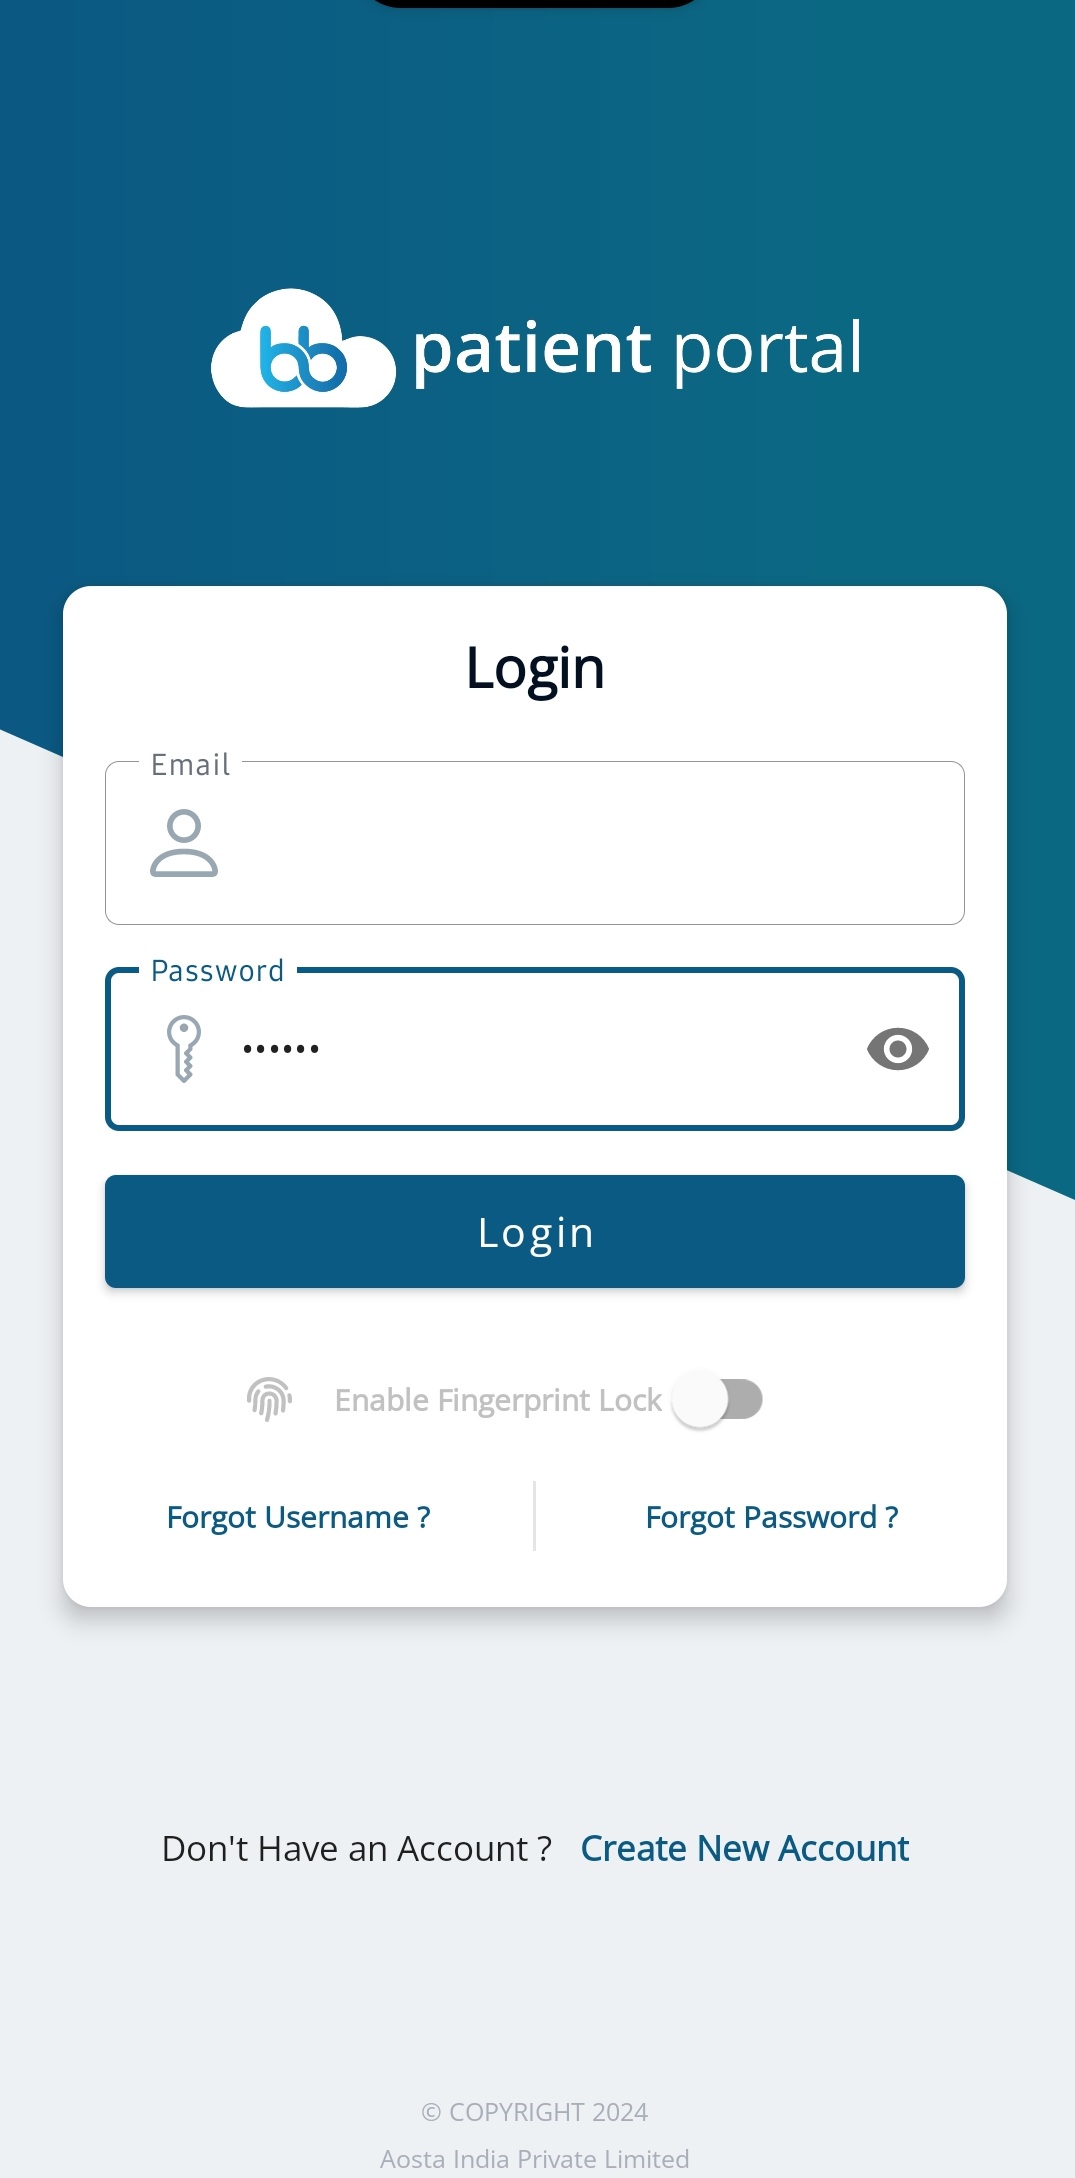
Enter your registered email and password to access your account.
5. OTP Verification
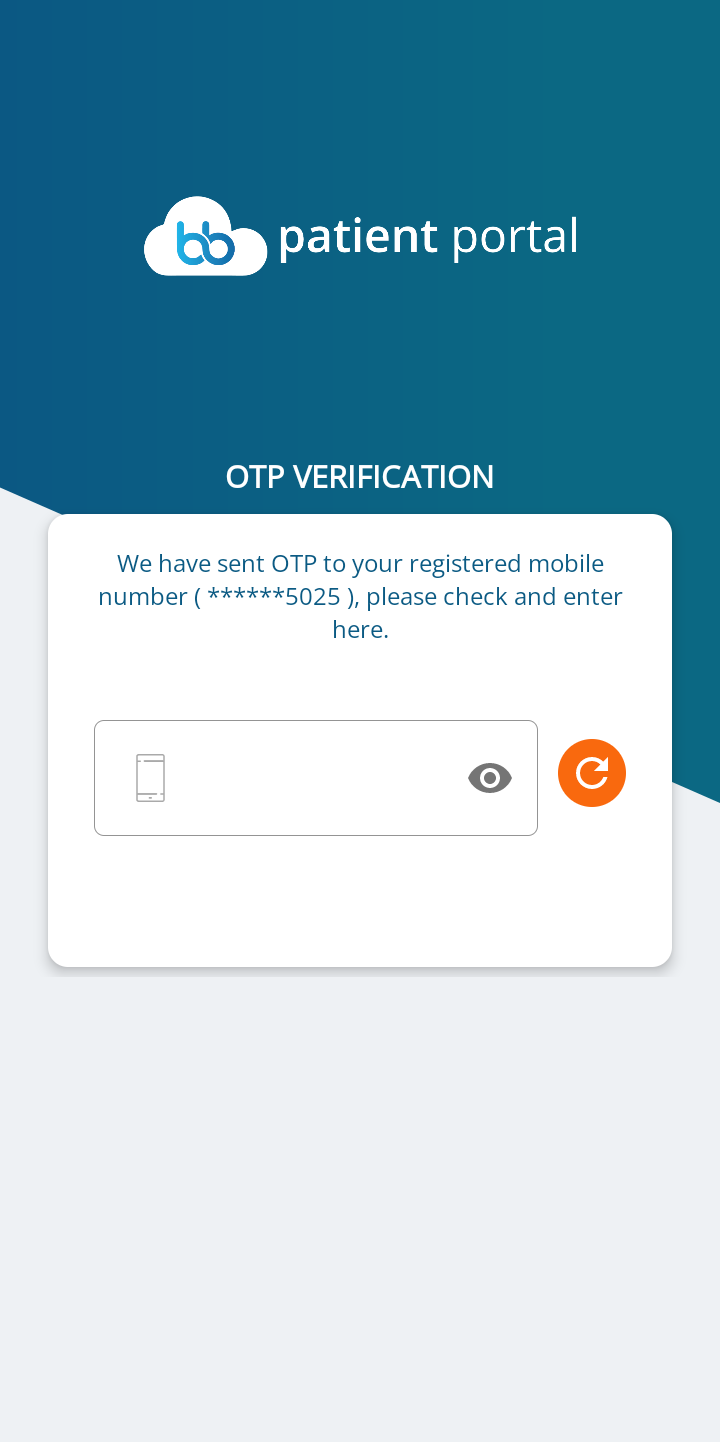
Enter the One-Time Password (OTP) sent to your registered mobile number.
6. Dashboard Access

Upon successful verification, you'll access your personalized dashboard.
Patient Registration
7. Add Patient

Click on + Icon & Select your registration type:
- "Existing Patient" - If you have a UHID at Indiana Hospital
- "New Patient" - If you're new to the hospital
8. Existing Patient Registration
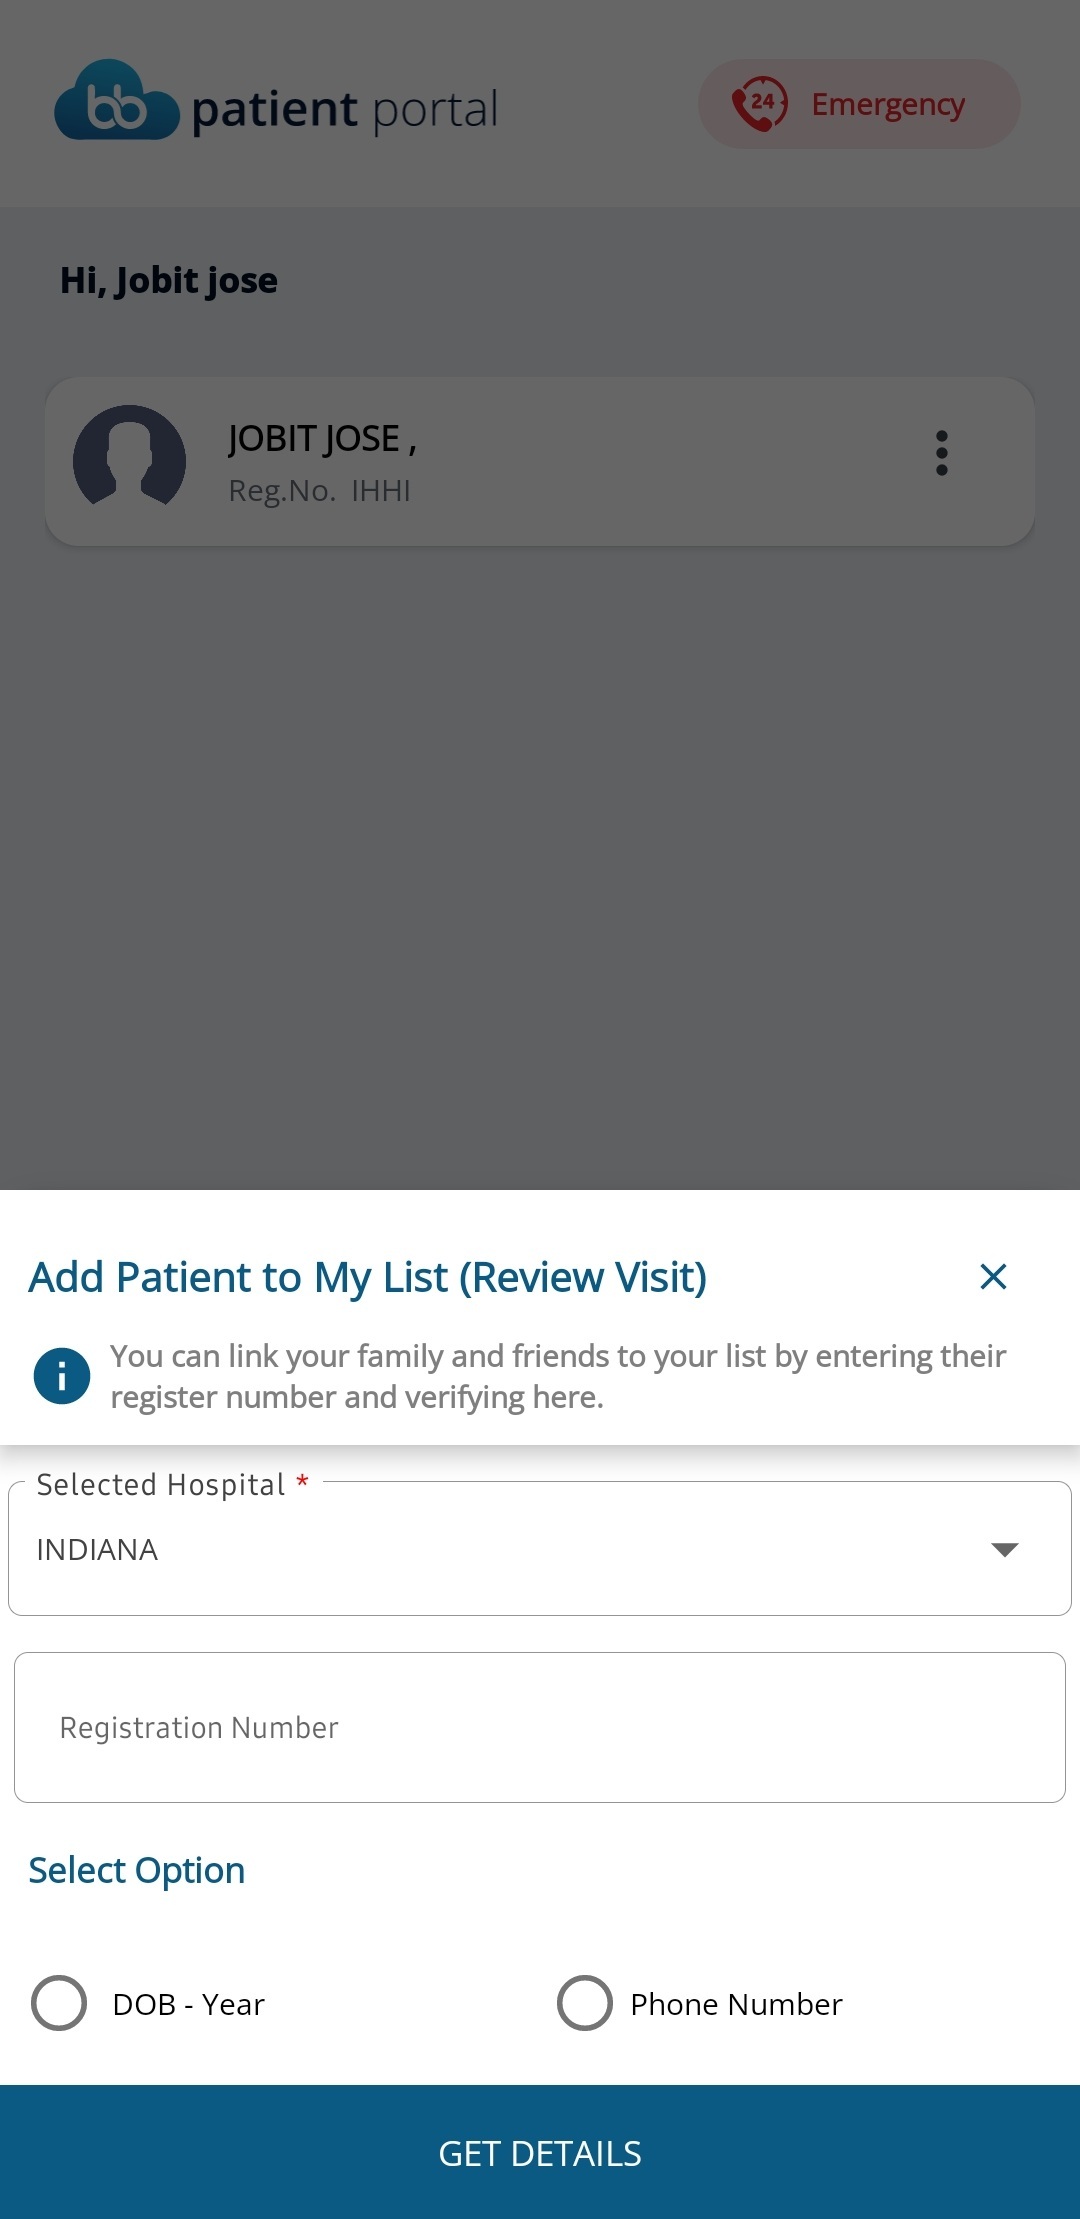
Enter your UHID and other required details to link your existing hospital record.
9. New Patient Registration
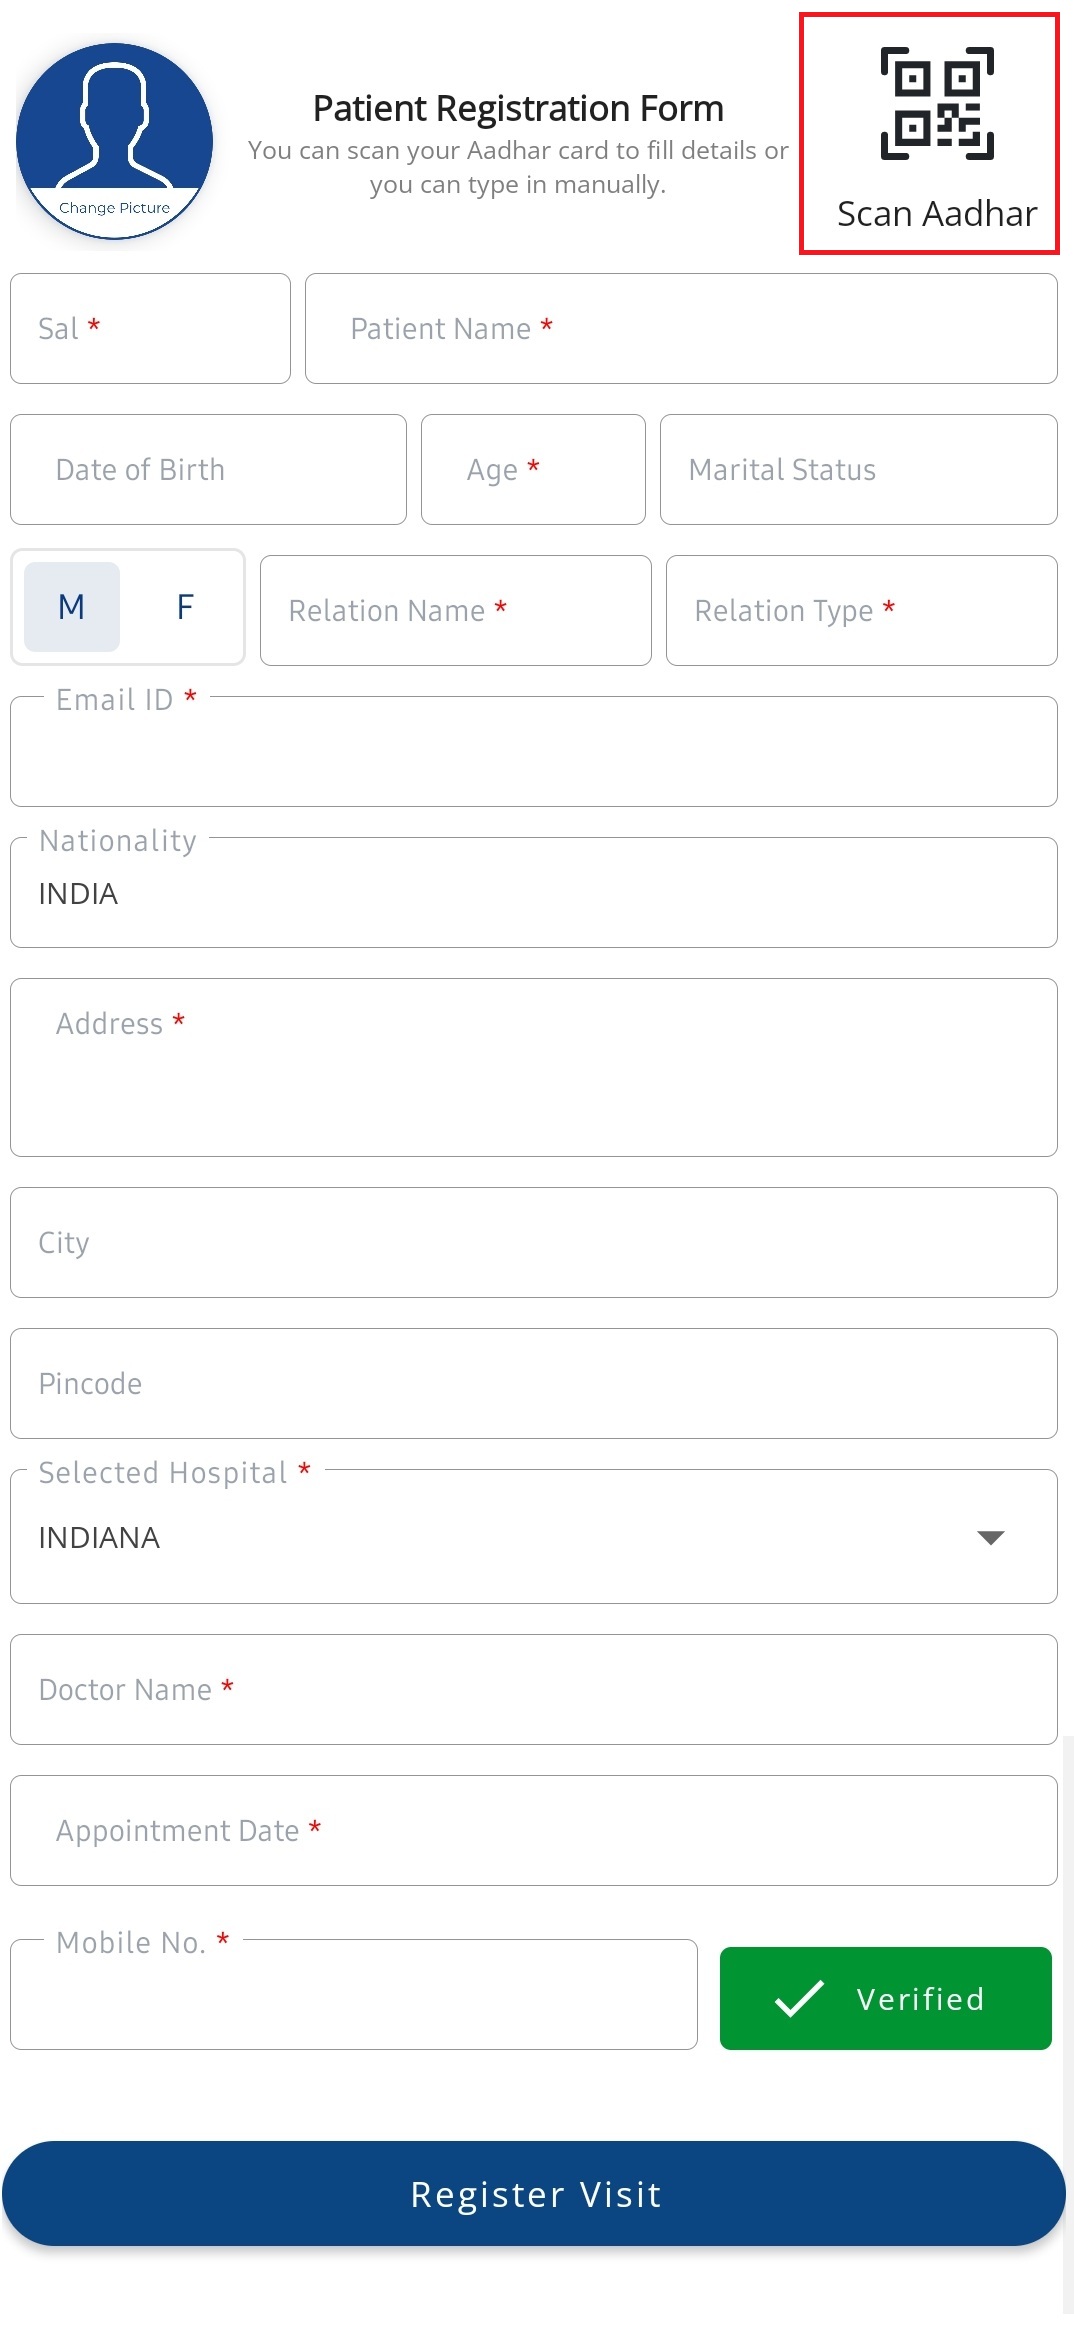
Complete your registration:
- Enter personal details manually, or
- Use "Scan Aadhaar" feature for quick registration
- Verify all information before submission
Appointment Booking Guide
10. Access Booking Menu
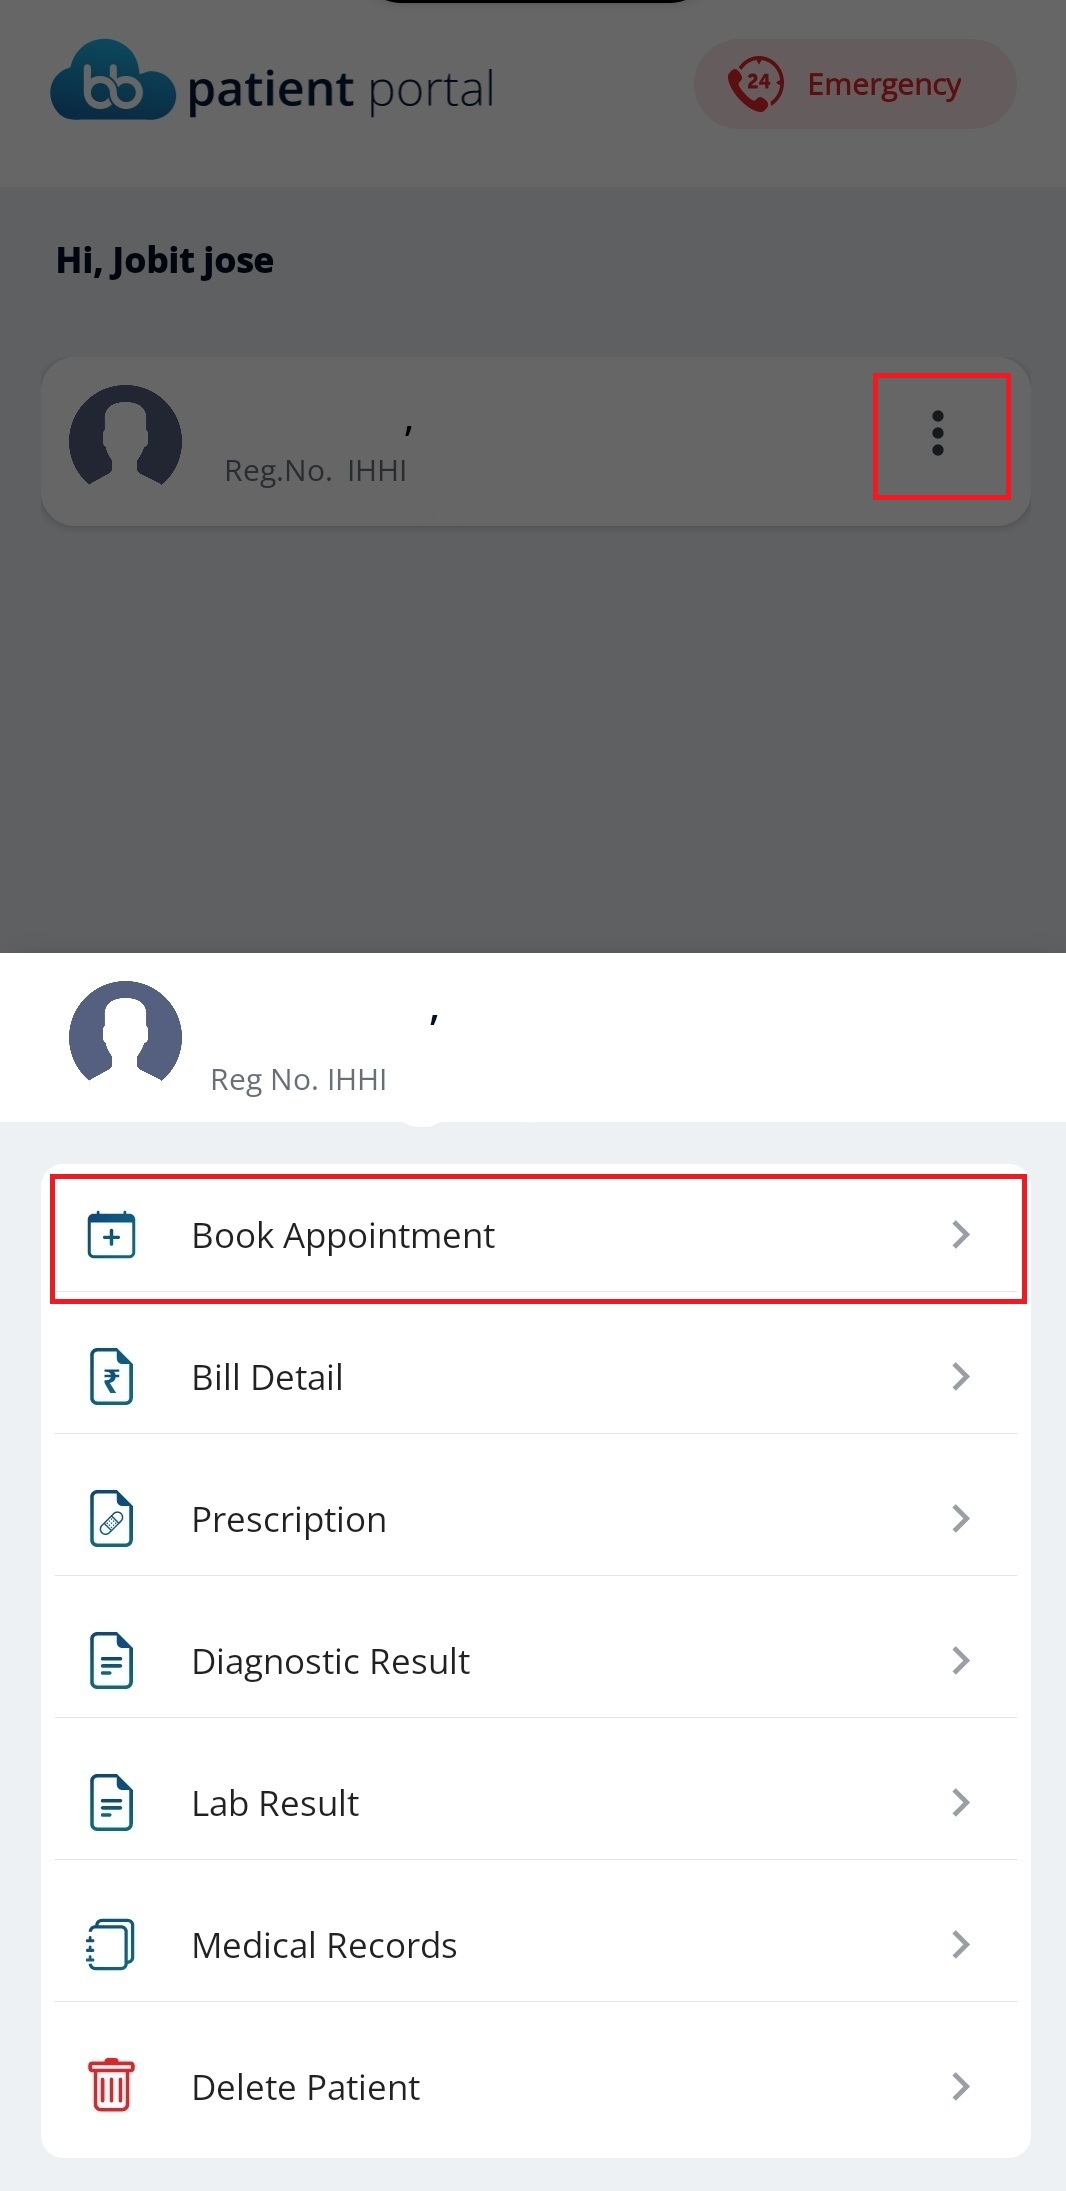
Tap the three-dot menu icon and select "Book Appointment" to begin scheduling.
11. Schedule Selection
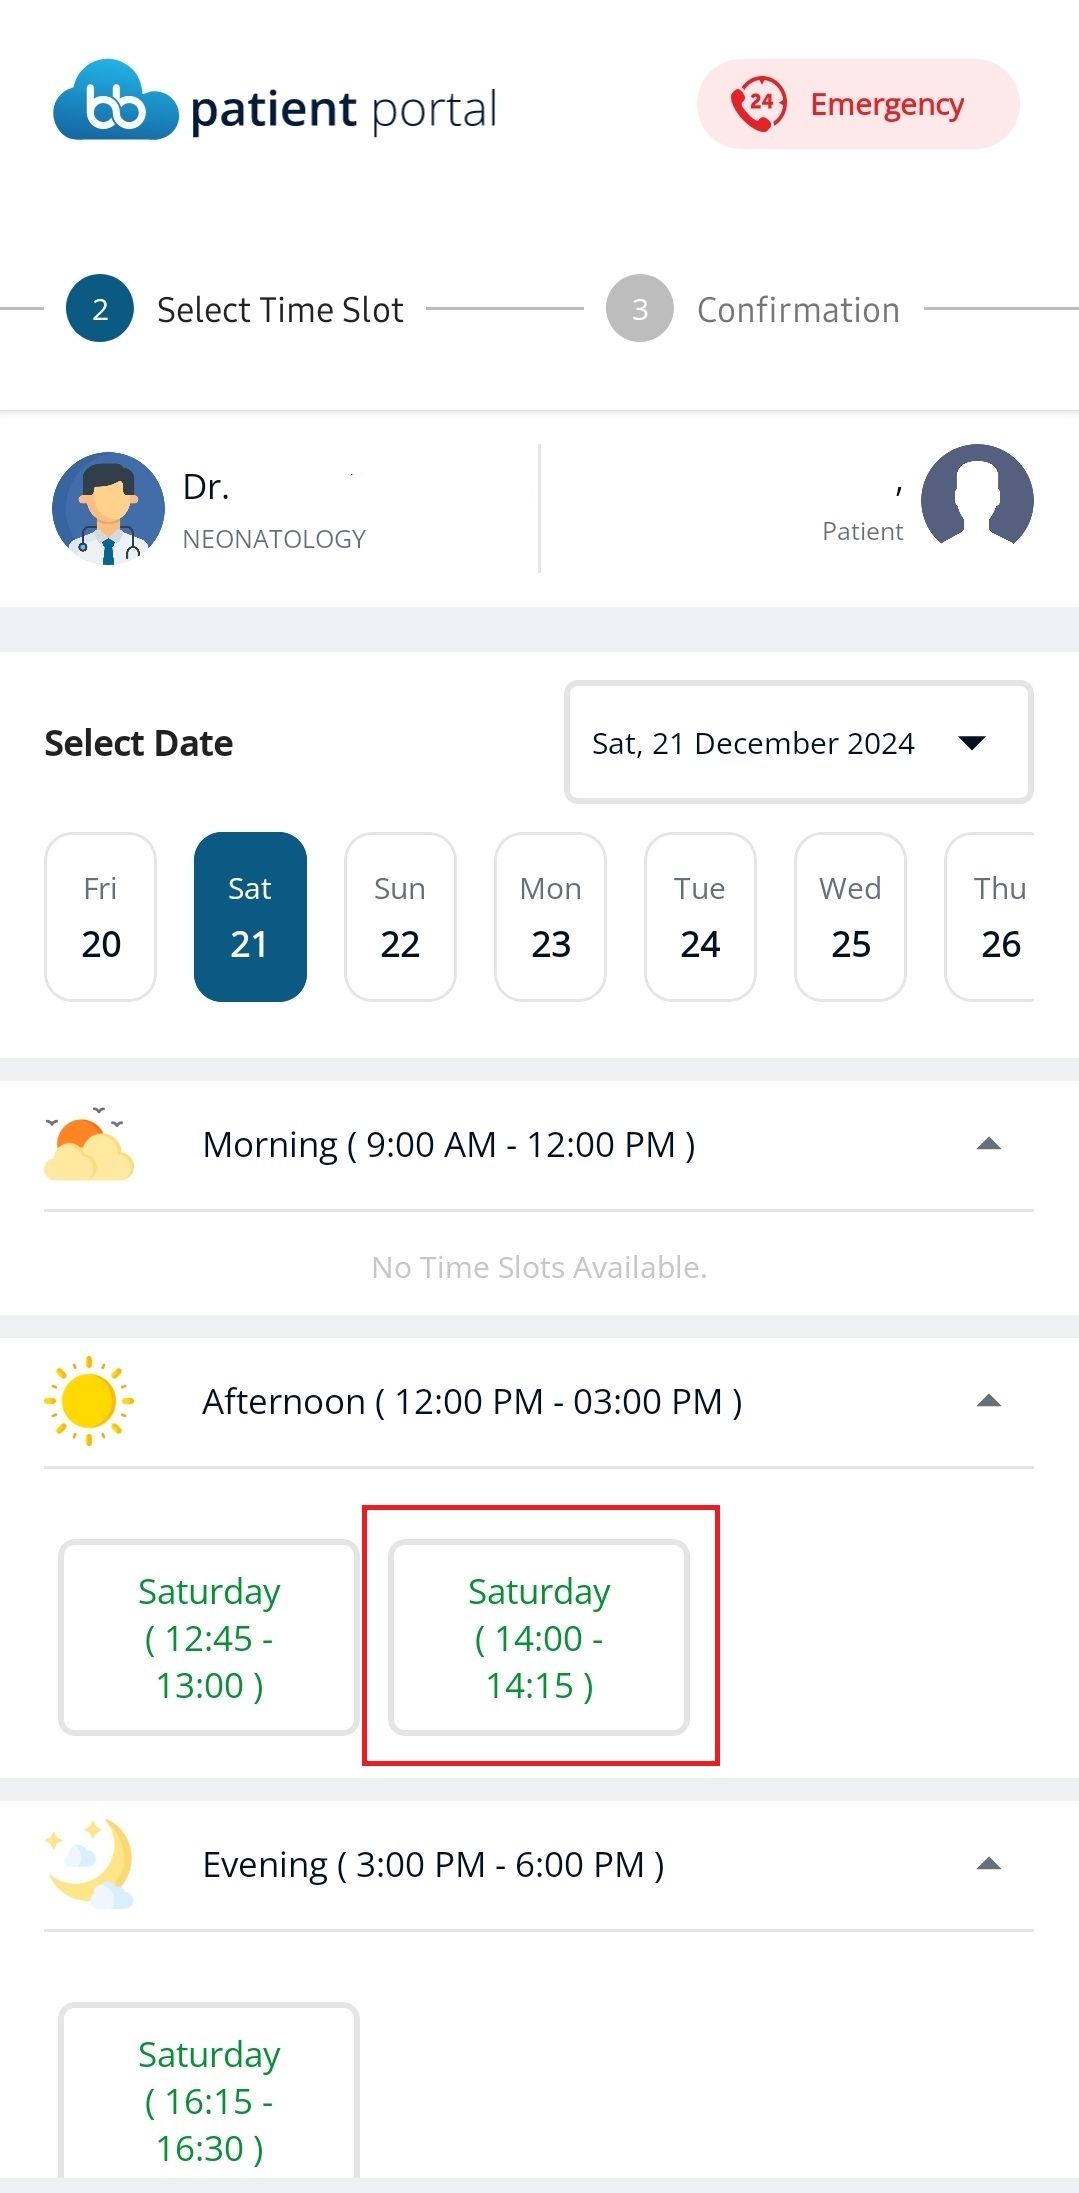
Choose your preferred:
- Doctor
- Date
- Available time slot
12. Appointment Confirmation
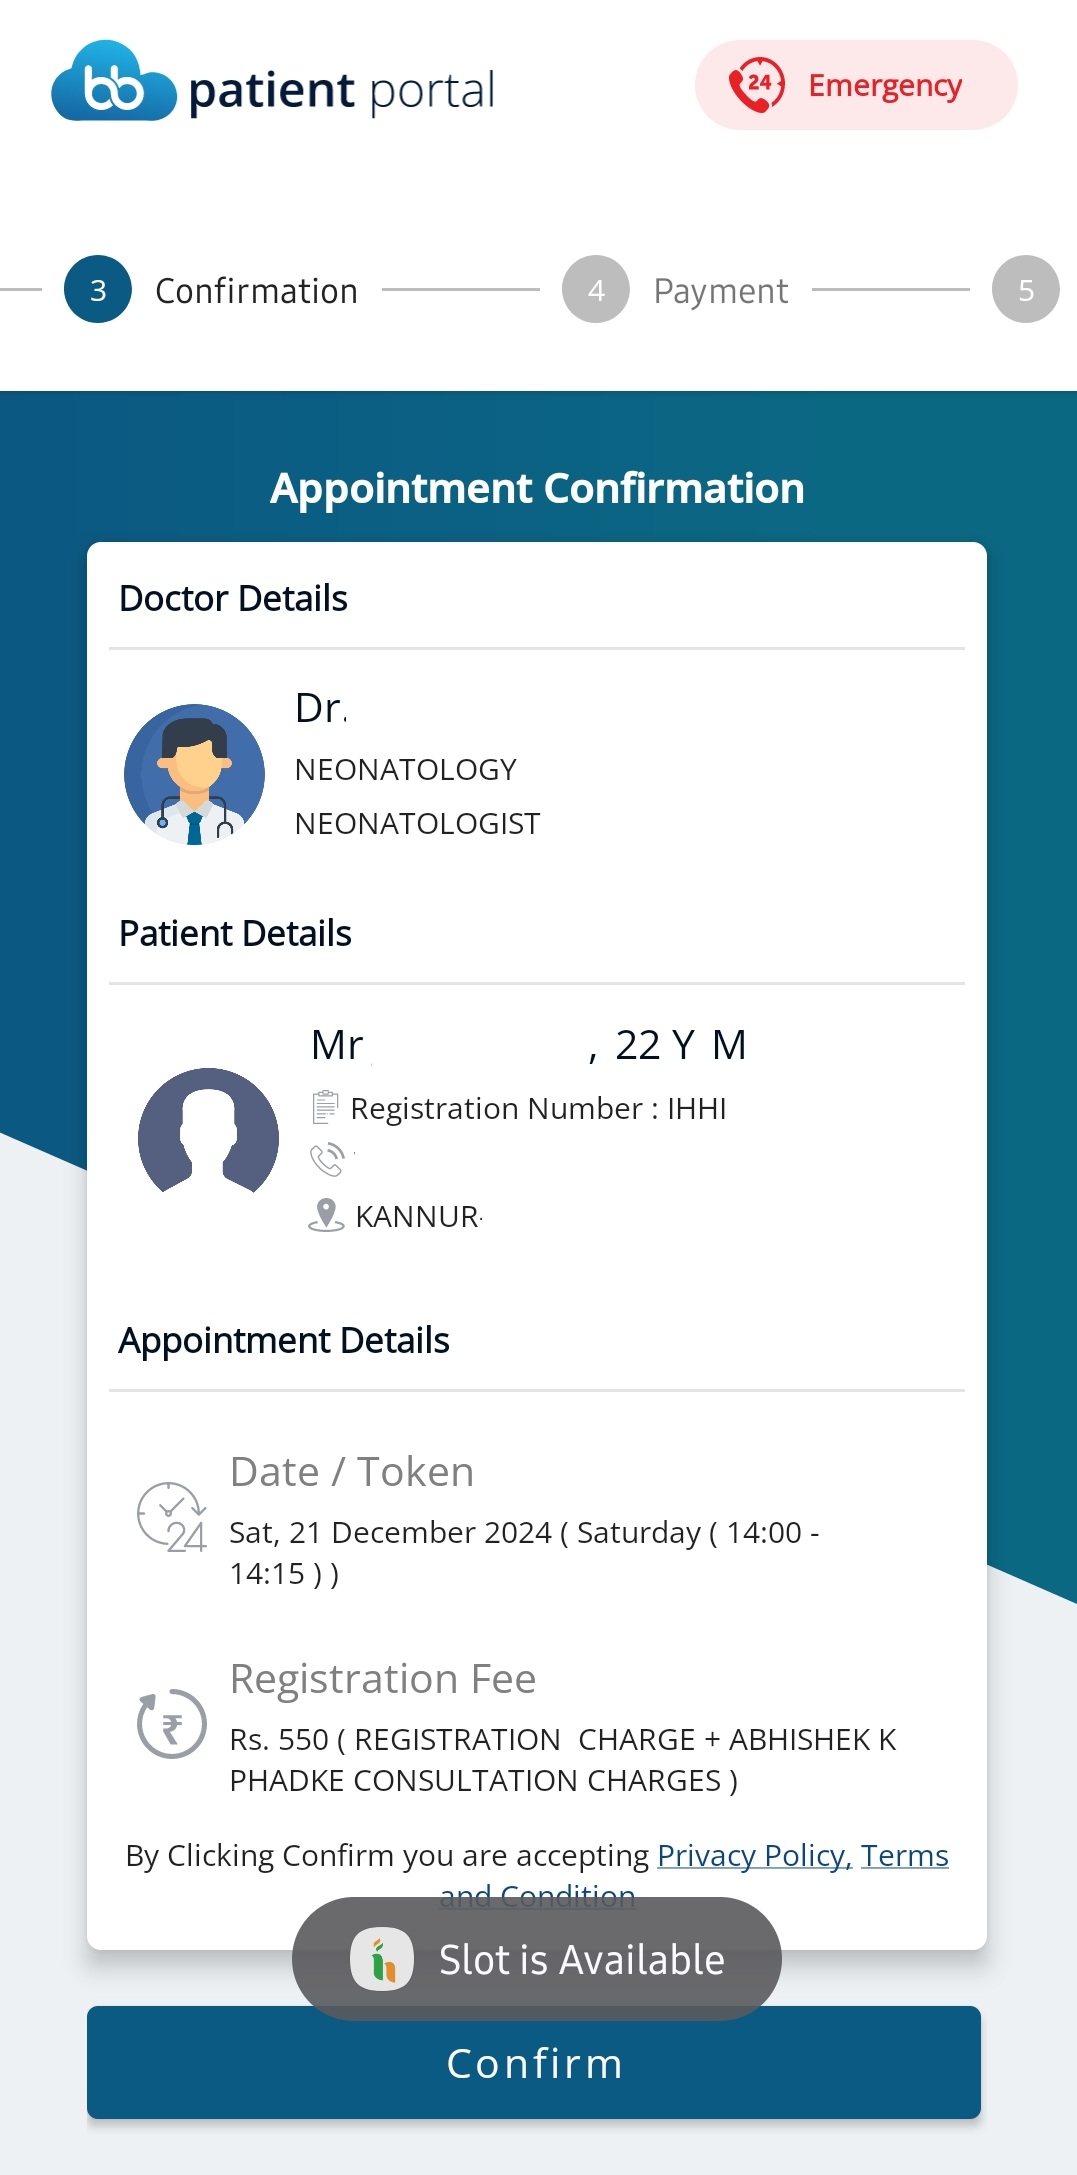
Review your appointment details carefully before proceeding to payment.
Payment & Confirmation Process
13. Payment Method
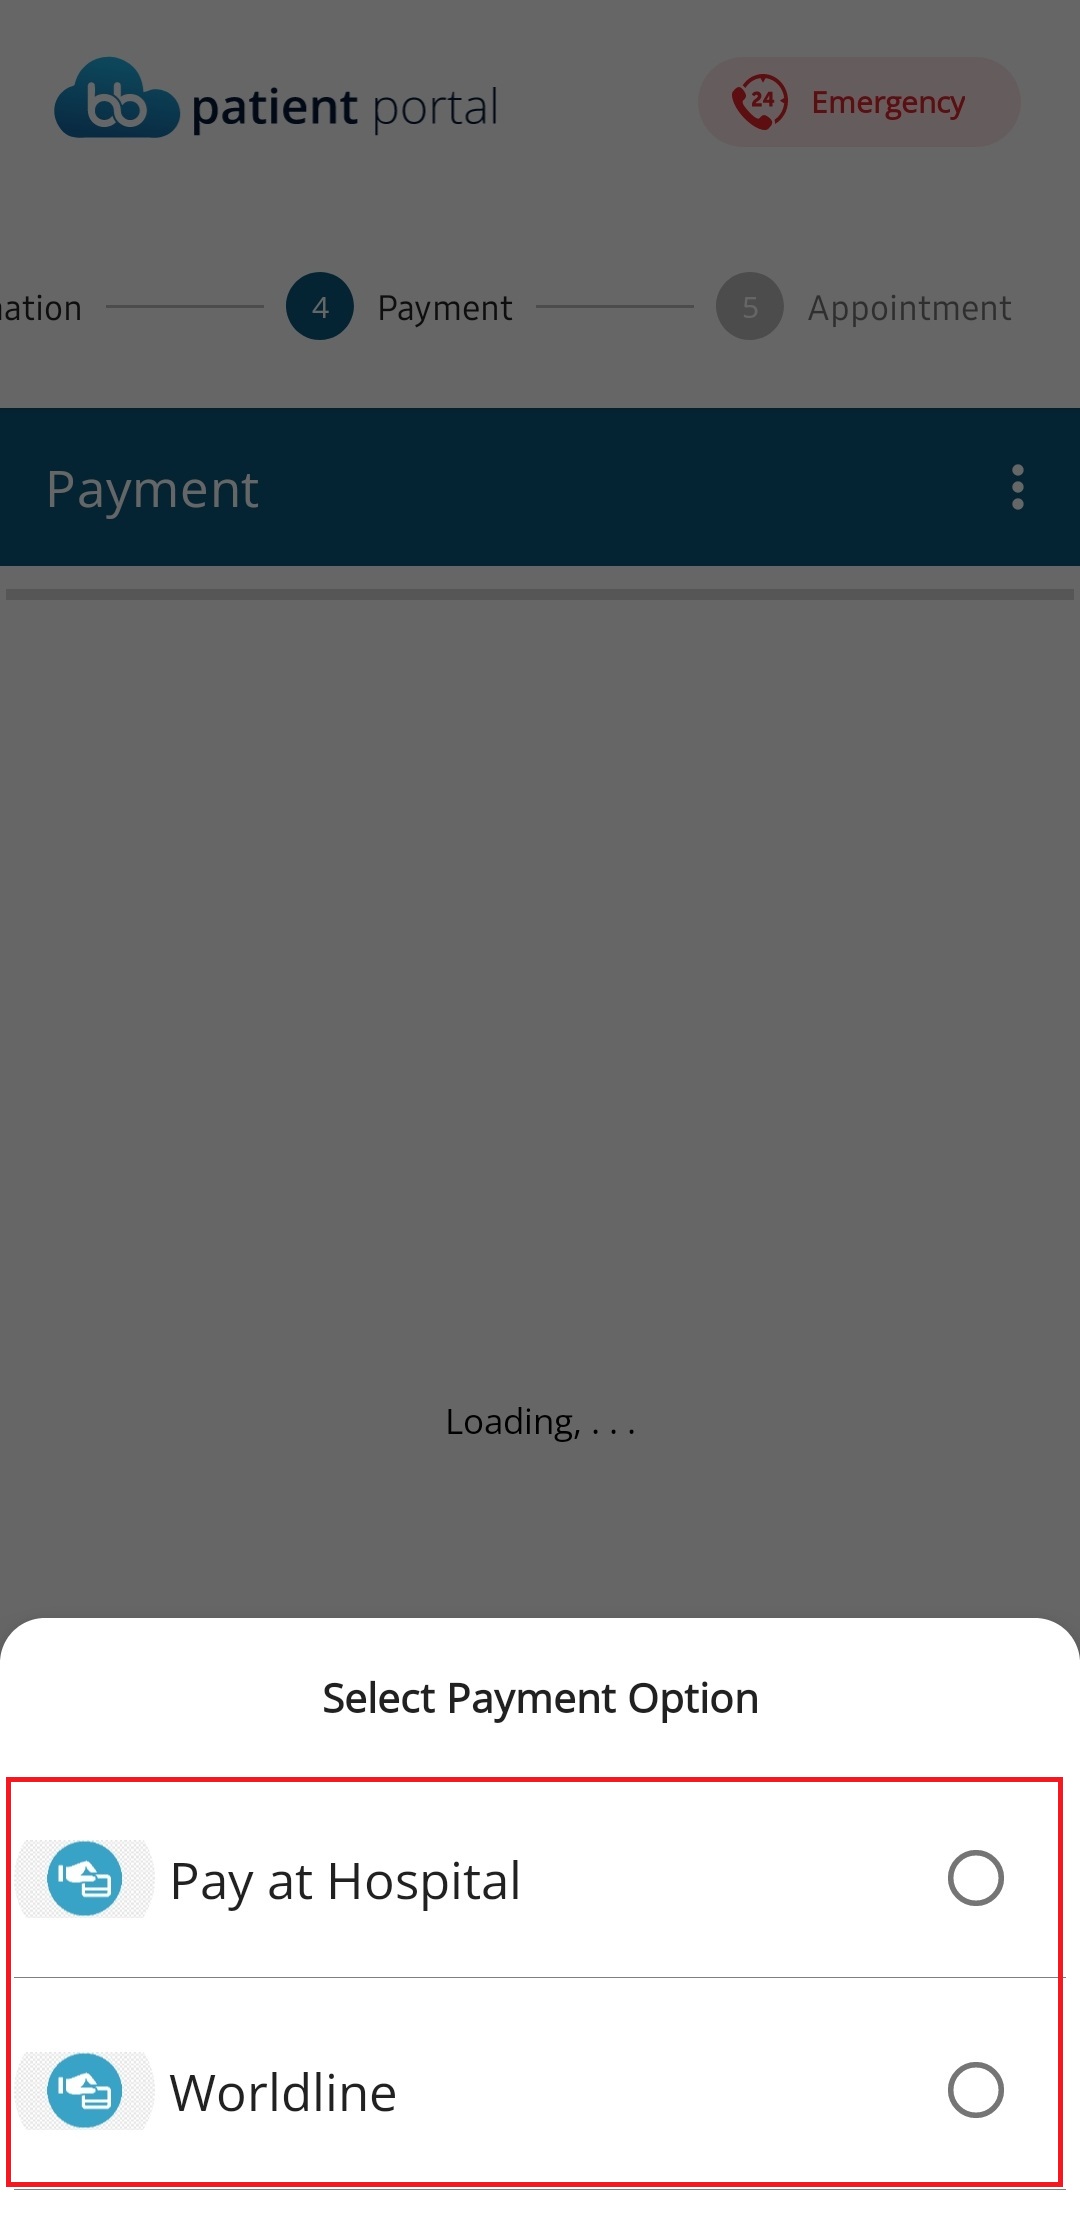
Select your preferred payment method from the available options.
14. Calendar Integration
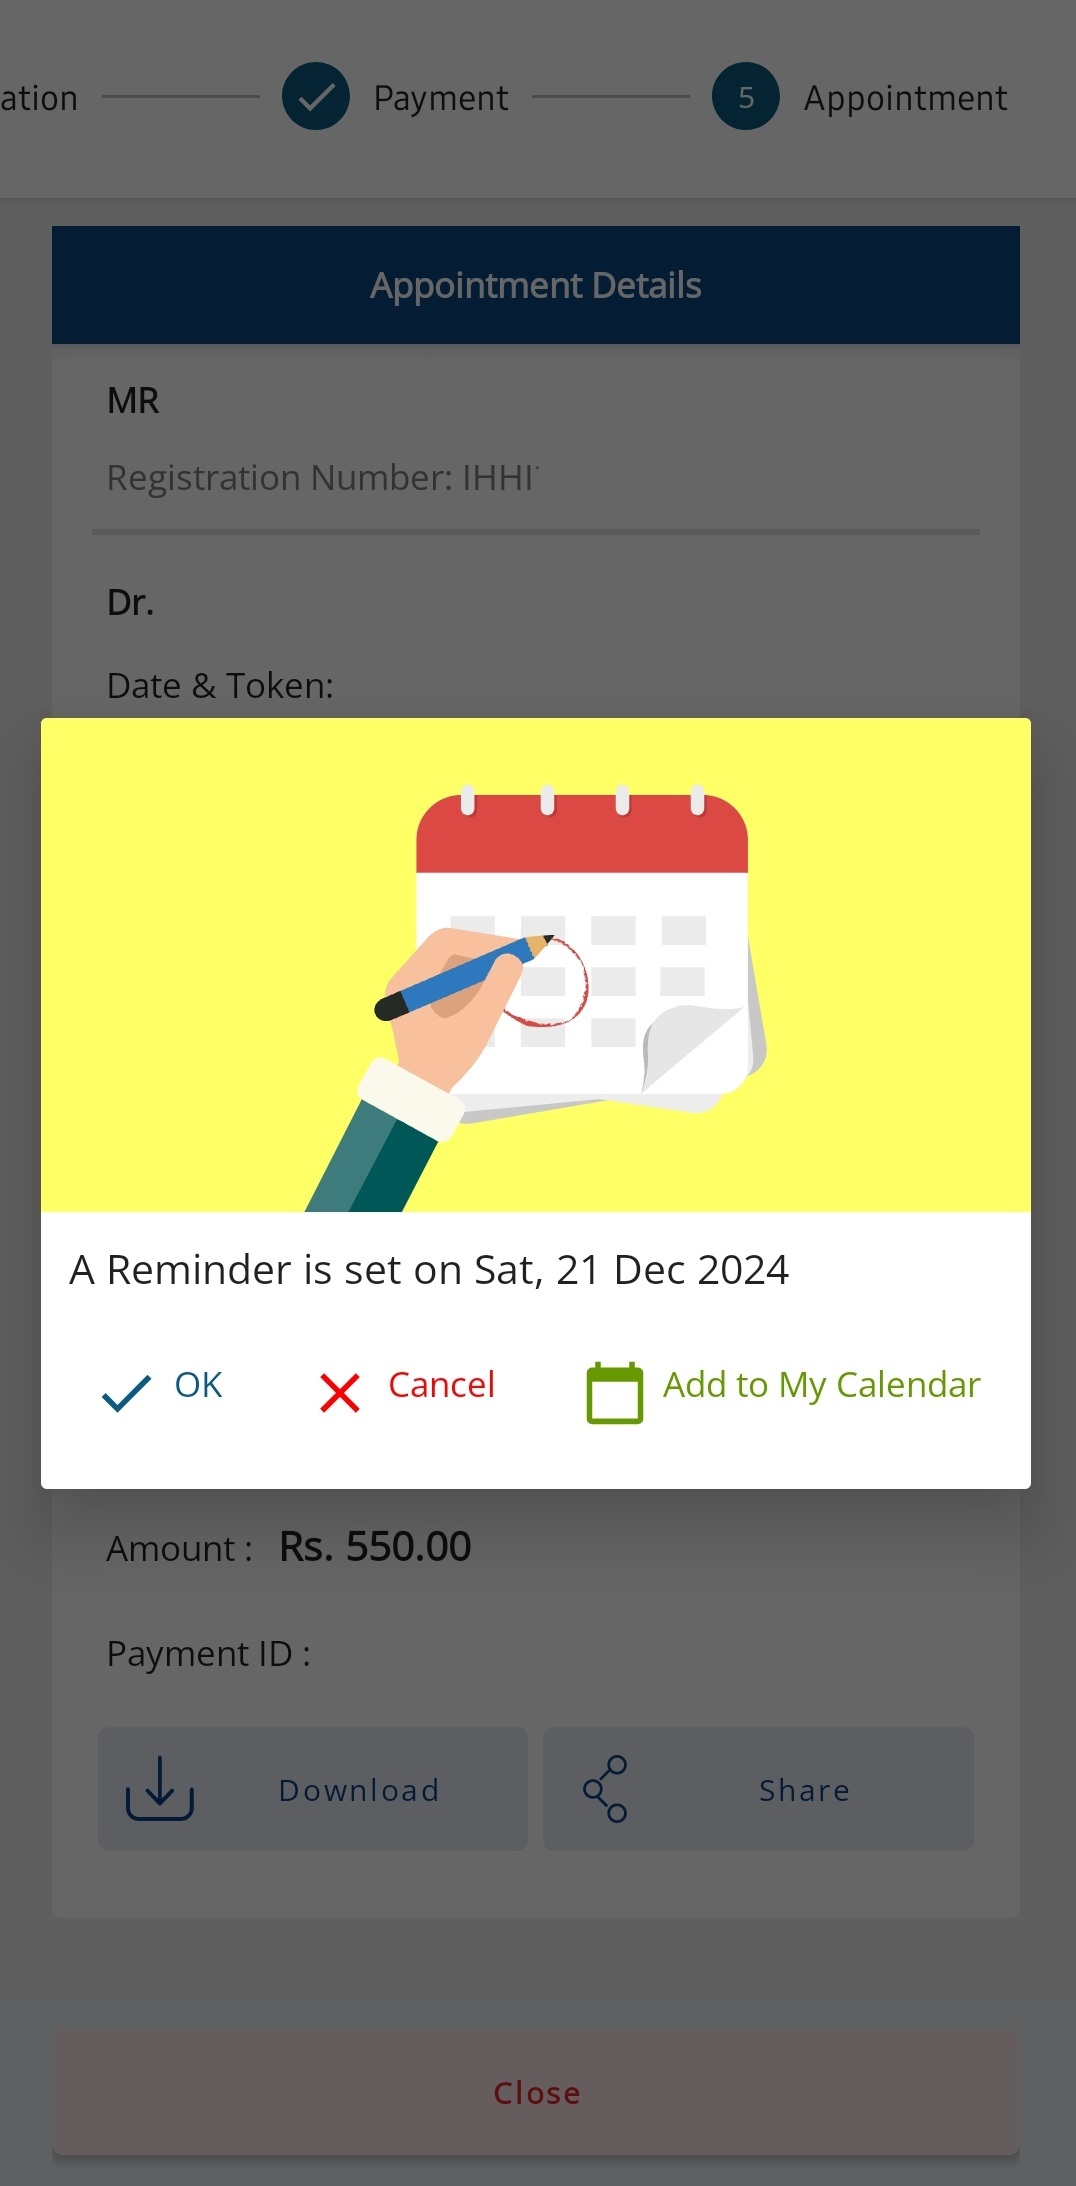
Choose to add the appointment to your device calendar for automatic reminders.
15. Booking Complete
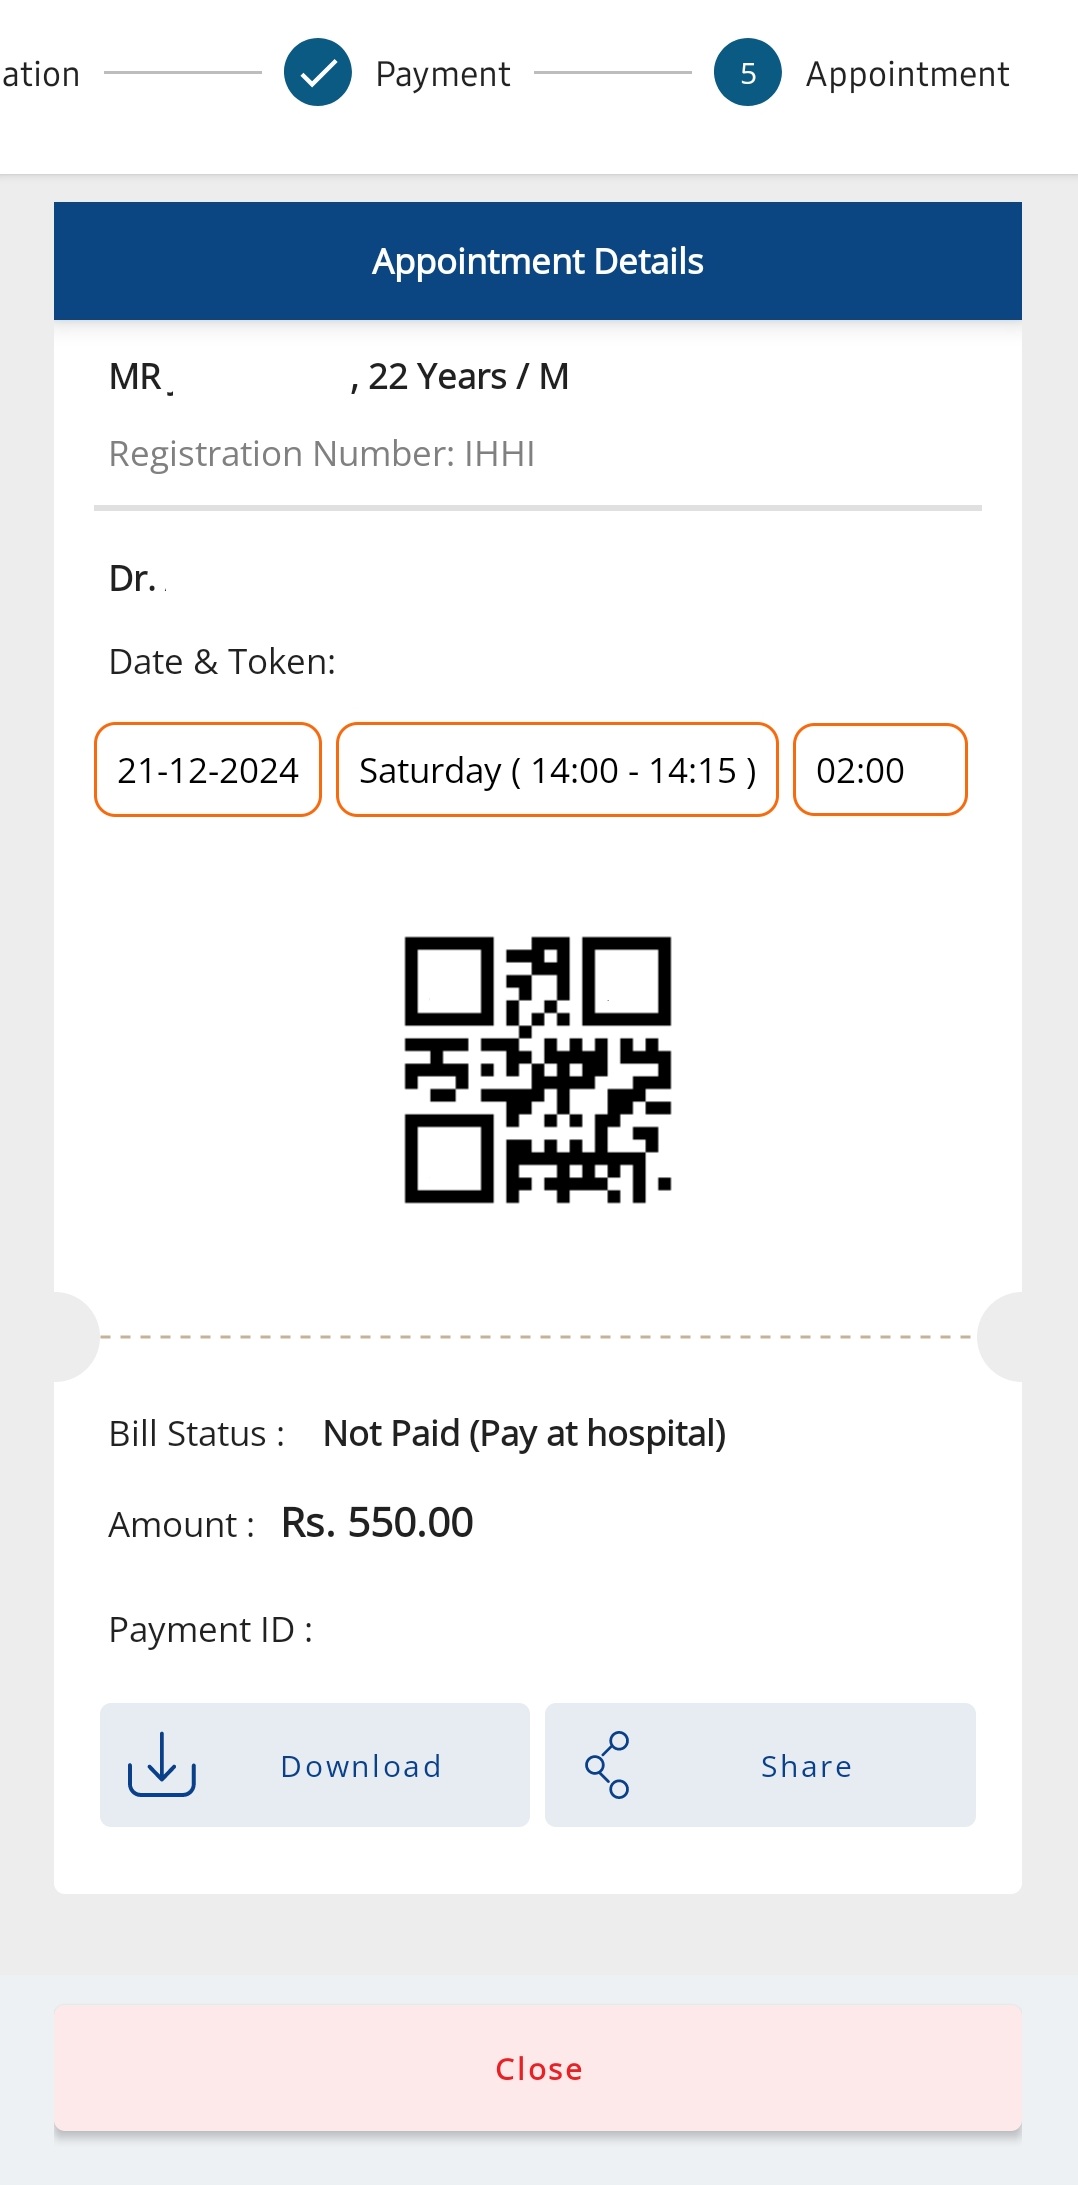
Review your confirmed appointment details:
- Doctor's information
- Date and time
- Payment confirmation
- QR code for hospital visit
Accessing Additional Services
Quick Access Menu
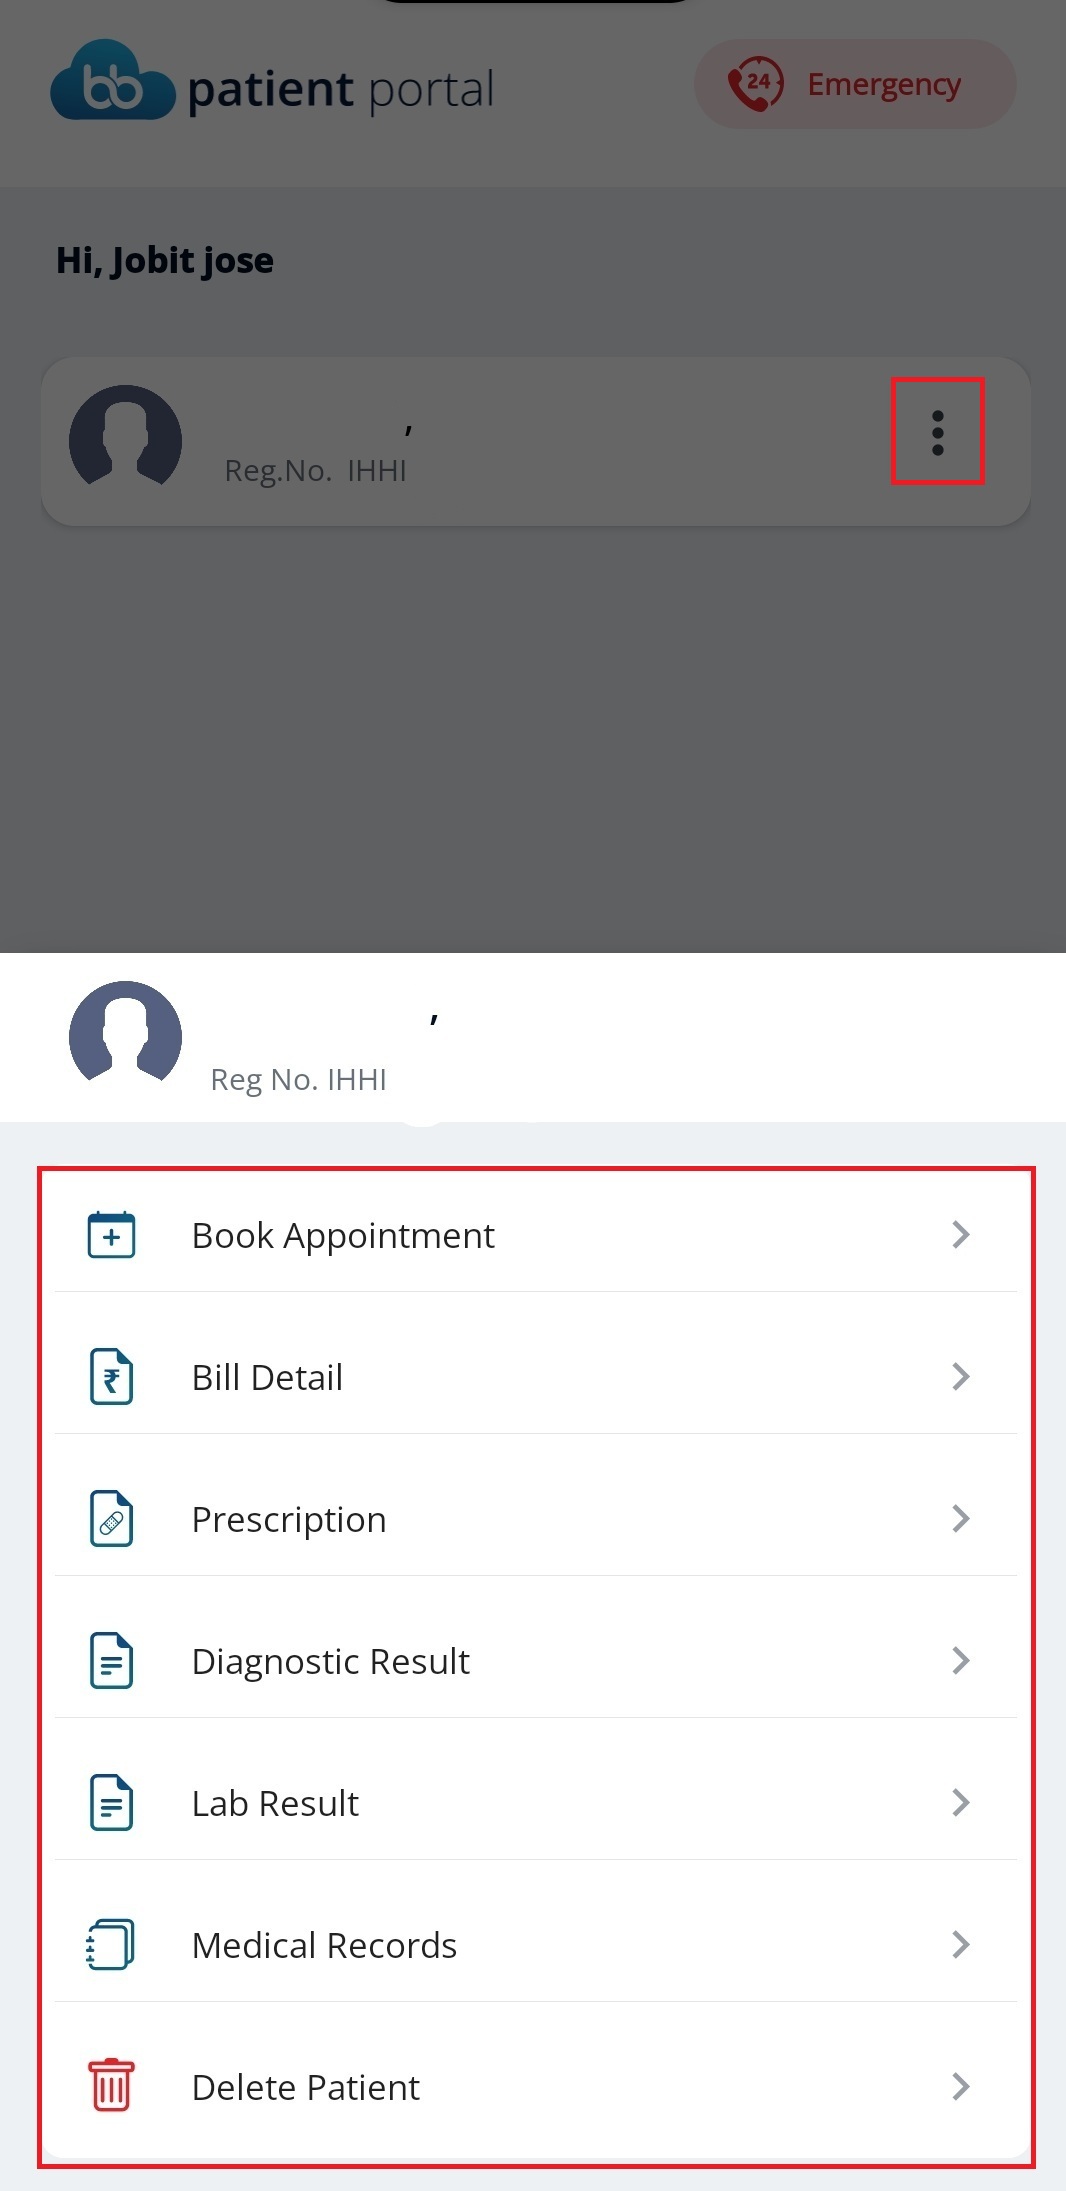
To access additional services:
- Locate the three-dot menu icon in the top-right corner
- Tap to open the services menu
- Select your desired service from the available options
Available Services
-
Bill Details
Access and download your medical bills and payment history
-
Prescriptions
View and download your current and past prescriptions
-
Lab Results
Access your laboratory test results and reports
-
Medical Records
View your complete medical history and documentation
-
Diagnostic Results
Access your diagnostic test results and imaging reports
